The Graph Studio
Table of Contents
We use Graph to index data to read from blockchains in a decentralized way. This is an example to get started and create a first subgraph to can be used by any application.
Deploy a subgraph using Subgraph Studio
1. Login The Graph Studio
Go to The Graph Studio and login using your web3 wallet.
Create a new subgraph and give it a name.
For example: subgraph26
2. Install graph-cli and initialize the subgraph
Install npm package graph-cli
npm install -g @graphprotocol/graph-cli
3. Choose a contract to index
In this example we are going to look at Test Tether USD token (USDT). Looking in Etherscan we can see that the contract address is 0x7169d38820dfd117c3fa1f22a697dba58d90ba06.
4. Initialize the subgraph
graph init --studio subgraph26
Initialize the subgraph (this will create a subfolder with the same name as the subgraph)
$ graph init --studio subgraph26

✔ Protocol · ethereum
✔ Subgraph slug · subgraph26
✔ Directory to create the subgraph in · subgraph26
✔ Ethereum network · sepolia
✔ Contract address · 0x7169d38820dfd117c3fa1f22a697dba58d90ba06
✔ Fetching ABI from Etherscan
✖ Failed to fetch Start Block: Failed to fetch contract creation transaction hash

✔ Start Block · 2060228
✔ Contract Name · TetherToken
✔ Index contract events as entities (Y/n) · true
  Generate subgraph
  Write subgraph to directory
✔ Create subgraph scaffold
✔ Initialize networks config
✔ Initialize subgraph repository
✔ Install dependencies with yarn
✔ Generate ABI and schema types with yarn codegen
Add another contract? (y/n):
Subgraph subgraph26 created in subgraph26

Next steps:

  1. Run `graph auth` to authenticate with your deploy key.

  2. Type `cd subgraph26` to enter the subgraph.

  3. Run `yarn deploy` to deploy the subgraph.

Make sure to visit the documentation on https://thegraph.com/docs/ for further information.
The Start Block you can find in Etherscan. For example, for Test USDT in Sepolia it’s 2060228.
The Contract name is is best practica to add the same name of the contract. In this case it is TetherToken.
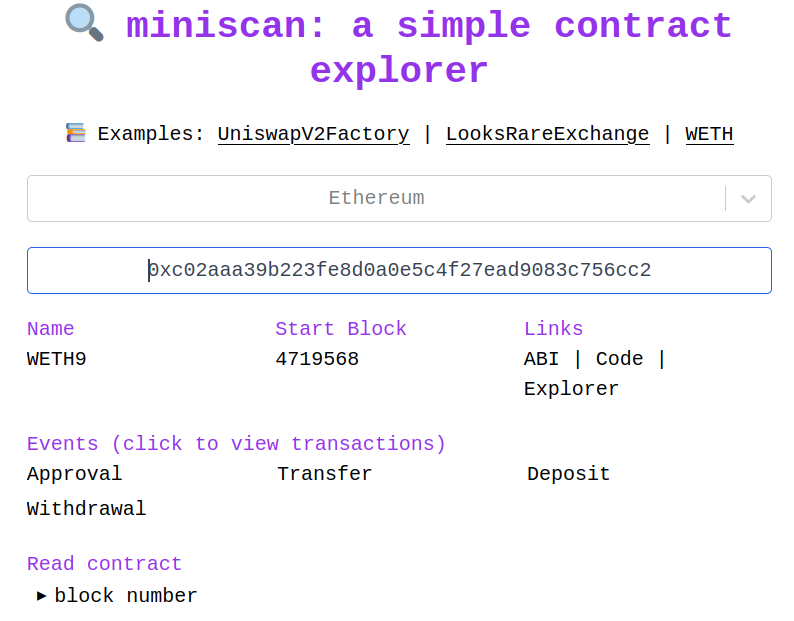
Another useful tool to get all the info I need about smart contract is miniscan.xyz. Not all blockchains are supported, but for the ones that are you can get useful information like the Start block very easyly.
5. Authenticate in CLI
I copy paste the line I see in thegraph studio for this. In my case:
$ graph auth --studio fd433d3bc7xxxxxxxxxxxxxxxxxxxxx
Deploy key set for https://api.studio.thegraph.com/deploy/
6. Build the subgraph
$ cd subgraph26 && graph codegen && graph build
Output should something like this:
  Skip migration: Bump mapping apiVersion from 0.0.1 to 0.0.2
  Skip migration: Bump mapping apiVersion from 0.0.2 to 0.0.3
  Skip migration: Bump mapping apiVersion from 0.0.3 to 0.0.4
  Skip migration: Bump mapping apiVersion from 0.0.4 to 0.0.5
  Skip migration: Bump mapping apiVersion from 0.0.5 to 0.0.6
  Skip migration: Bump manifest specVersion from 0.0.1 to 0.0.2
  Skip migration: Bump manifest specVersion from 0.0.2 to 0.0.4
✔ Apply migrations
✔ Load subgraph from subgraph.yaml
  Load contract ABI from abis/TetherToken.json
✔ Load contract ABIs
  Generate types for contract ABI: TetherToken (abis/TetherToken.json)
  Write types to generated/TetherToken/TetherToken.ts
✔ Generate types for contract ABIs
✔ Generate types for data source templates
✔ Load data source template ABIs
✔ Generate types for data source template ABIs
✔ Load GraphQL schema from schema.graphql
  Write types to generated/schema.ts
✔ Generate types for GraphQL schema

Types generated successfully

  Skip migration: Bump mapping apiVersion from 0.0.1 to 0.0.2
  Skip migration: Bump mapping apiVersion from 0.0.2 to 0.0.3
  Skip migration: Bump mapping apiVersion from 0.0.3 to 0.0.4
  Skip migration: Bump mapping apiVersion from 0.0.4 to 0.0.5
  Skip migration: Bump mapping apiVersion from 0.0.5 to 0.0.6
  Skip migration: Bump manifest specVersion from 0.0.1 to 0.0.2
  Skip migration: Bump manifest specVersion from 0.0.2 to 0.0.4
✔ Apply migrations
✔ Load subgraph from subgraph.yaml
  Compile data source: TetherToken => build/TetherToken/TetherToken.wasm
✔ Compile subgraph
  Copy schema file build/schema.graphql
  Write subgraph file build/TetherToken/abis/TetherToken.json
  Write subgraph manifest build/subgraph.yaml
✔ Write compiled subgraph to build/

Build completed: build/subgraph.yaml
7. Deploy to Studio
$ graph deploy --studio subgraph26
Which version label to use? (e.g. "v0.0.1"): v0.0.1
Skip migration: Bump mapping apiVersion from 0.0.1 to 0.0.2
Skip migration: Bump mapping apiVersion from 0.0.2 to 0.0.3
Skip migration: Bump mapping apiVersion from 0.0.3 to 0.0.4
Skip migration: Bump mapping apiVersion from 0.0.4 to 0.0.5
Skip migration: Bump mapping apiVersion from 0.0.5 to 0.0.6
Skip migration: Bump manifest specVersion from 0.0.1 to 0.0.2
Skip migration: Bump manifest specVersion from 0.0.2 to 0.0.4
✔ Apply migrations
✔ Load subgraph from subgraph.yaml
Compile data source: TetherToken => build/TetherToken/TetherToken.wasm
✔ Compile subgraph
Copy schema file build/schema.graphql
Write subgraph file build/TetherToken/abis/TetherToken.json
Write subgraph manifest build/subgraph.yaml
✔ Write compiled subgraph to build/
Add file to IPFS build/schema.graphql
.. QmQjchRTvjddW2pyxBAN3sWop2GUw8iLNyu58toiKoJoM7
Add file to IPFS build/TetherToken/abis/TetherToken.json
.. QmSju3H214f3VXyD3yDXGc3nVcs1dgvkTDQfFDfZ2yksJw
Add file to IPFS build/TetherToken/TetherToken.wasm
.. QmYZAJ5i7tKG2yr7PZxfYdgRTqCyepUFXKdMT9cKALMXjU
✔ Upload subgraph to IPFS
Build completed: QmSYeKC1SDwhjH3U8FhcbpEdXz51PeySJvcXBvi1VE233b
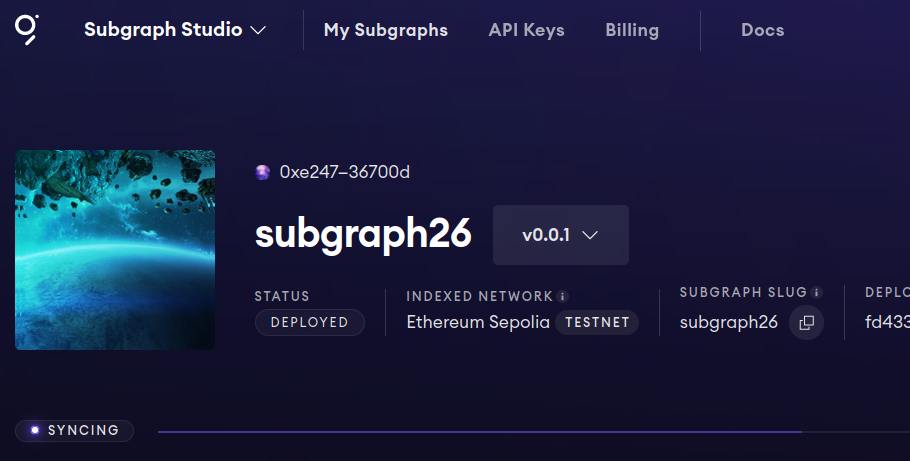
Deployed to https://thegraph.com/studio/subgraph/subgraph26
Subgraph endpoints:
Queries (HTTP): https://api.studio.thegraph.com/query/56687/subgraph26/v0.0.1
Now in Studio you should see the version deployed and syncing:
8. Change schema.graphql
By now you will have a file called schema.graphql in your folder, with a content similar to this:
type Issue @entity(immutable: true) {
  id: Bytes!
  amount: BigInt! # uint256
  blockNumber: BigInt!
  blockTimestamp: BigInt!
  transactionHash: Bytes!
}

type Redeem @entity(immutable: true) {
  id: Bytes!
  amount: BigInt! # uint256
  blockNumber: BigInt!
  blockTimestamp: BigInt!
  transactionHash: Bytes!
}

type Deprecate @entity(immutable: true) {
  id: Bytes!
  newAddress: Bytes! # address
  blockNumber: BigInt!
  blockTimestamp: BigInt!
  transactionHash: Bytes!
}
...
We can now modify this graphql code to our needs and redeploy newer versions of my subgraph.
3 files are important here:
subgraph.yaml- this is the main file that contains the name of the subgraph, the contract address, the start block, the schema and the mapping.mappings.ts- this is the file that contains the mapping of the contract events to the graphql schema.schemas.graphql- this is the file that contains the graphql schema.
9. Example Query
Lets query the last 2 transfers of 10 USDT in Sepolia:
query firstquery {
  transfers(
    first: 2
    orderBy: blockNumber
    orderDirection: desc
    where: {value: "10000000"}
  ) {
    blockTimestamp
    id
    from
    to
    value
  }
}
Replies with:
{
  "data": {
    "transfers": [
      {
        "blockTimestamp": "1698246696",
        "id": "0x4d749cc7cb6c511b6ef90f0490ac6cb249b76ad5398c41a63e498cf1a34cb38e4f000000",
        "from": "0x00199b1aba7c18a068f2840d059246375e927dde",
        "to": "0xdccd1e7ef46a5620081e581398d5a77bf1e9762d",
        "value": "10000000"
      },
      {
        "blockTimestamp": "1698246072",
        "id": "0xc4b29d30dbe47dc00a6d5169ceeca665a145df1931b2c98820169fed853980c539000000",
        "from": "0xec6689752b235df0a70cf9e5d77bf416c74cf995",
        "to": "0x00199b1aba7c18a068f2840d059246375e927dde",
        "value": "10000000"
      }
    ]
  }
}
Notes
Graph Token is a ERC-20 Token on Ethereum (token address) and Arbitrum (token address).
Here is a good article explaining the differences between GraphQL APIs and REST API.
API KEY
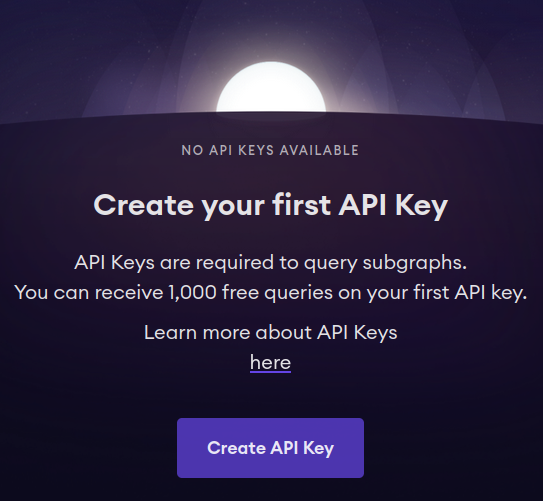
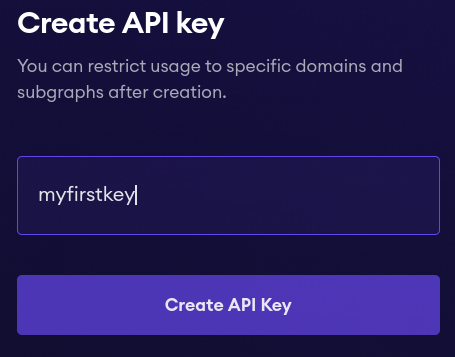
If you enter an email you will get 1000 free queries to test your API key.
Comment a parragraph about the API key.
THE GRAPH PRESENTATION PITCH
SLIDE 1 Software Chosen: Subgraph Studio
Hi!

Today I'm going to talk to you about "The Graph" and particulary the "Subgraph Studio"
SLIDE 2 - Evolution of reading blockchain data
The Graph is all about reading data from the blockchain

Reading data from the blockchain has had it's challenges and there has been an evolution on the way we do it.

When blockchains were first introduced you had to query a node, as the nodes are the ones that contain all the data of the blockchain.

This method had many drawbacks.

It's slow, complex and requires a deep understanding of the blockchain architecture.

So, it didn't take long for third parties to create easily usable APIs.

For the non-technical audience, an API is basically just a popular method that allows different software applications to communicate and exchange data between each other. You can think of it as a machine-to-machine communication.

Your application requests some data using an API and it gets back the data it needs.

Simple and effective.

However, it also created a new set of problems.

1. They can be very expensive

2. You need to trust that they are delivering the correct data

3. They can have Limited Customization, as you are limited by the APIs they provide.

4. You are depending on an external service, which might have downtime, usage limits, or changes in their service policies.
SLIDE 3
Enter "The Graph"

With "The Graph" you can read data from a blockchain in a decentralized, scalable and cost effective way.

It's Decentralized, because you never rely on one single provider.

They are multiple nodes on the network that can respond to your request.

If done correctly, it can't be shut down.

There is no downtime.

Secondly, it's Scalable.

If your demand grows, the network adapts. As simple as that.

And then, it's cost effective.

Much cheaper than thrid party APIs.

It's also important to note that "The Graph" allows you to query data from mulitple blockchain using the same language.

This makes it very easy to interact with multiple chains.

This is very important knowadays that we don't have just one blockchain.

We have multiple blockchains in the market that are being used by different applications.
SLIDE 4
So, how does it work?

We have the GRT token. This is a utility token that keeps the Graph up and running.

And we have 4 important actors in the network.
SLIDE 5
First we have the developers. That's you.

Your application needs some information from the blockchain. So you create what's called a "Subgraph".

We will learn more about "Subgraphs" later in the demo when we create one. For now, you can think of them as queries of the information you need.

For example: "show me the transactions of a specific Ethereum address".

You pay to access this information with GRT tokens.
SLIDE 6
Then we have indexers.

Indexers do the actual work.

They run a graph node and they index relevant subgraphs.

In other words, they are monitoring the blockchain and keeping your "queries" up to date, making your data available for whenever you need it.

For all this, obviosly they get paid.

They earn rewards for indexing, and a fee for serving data on the subgraphs.

They also need to stake GRT tokens, so if they misbehave they are financially punishied.

This makes it in their best interest to provide a high quality service.
SLIDE 7
Then we have the curators.

As anybody can create subgraphs, we will have subgraphs with high demand and subgraphs that never get called at all.

Indexers have limited resourcers, so they need to know which "subgraphs" are worth their time.

As this is what the curators are for.

Curators "select" what subgraphs are worth indexing, by a process we call "Signal".

Curators receive rewards if a particular subgraph becomes popular.

It's important to note here, that developers can also be curators of their own subgraphs to make sure they are always avaliable even if they are not popular.
SLIDE 8
Lastly we have Delegators

Delegators don't run a node.

You can think of delegators as rich influencers or celebrities that publicly recommend a service.

In this case, they recommend indexers.

They stake GRT on behalf of the Indexers.

So they earn a portion of the indexers income if things go well, and loose money if the indexers misbehaves.

Similar to when a celebraty recommends a restaurant. They usually get paid for doing so, but their reputation is at stake and can suffer if it goes wrong.

These 4 players make the graph network run in armony in a very efficient and reliable way.

To understand the benefits of the graph,  you don't need to fully understand all the details of these players.

The main idea you do need to understand here, is that The Graph is organized in such a way, that if used correctly, the data you need is always going to be availbale.

The network and all of its players have economic incentives for it to be that way.
SLIDE 9
So, what is Subgraph Studio?

The Subgraph Studio is a web application that allows you to interact with the graph.

As developers we will need to create the subgraphs or queries of what we need.

For example: "Show me the transactions of a given Ethereum address"

In Subgraph Studio we can easily create, manage and publish our subgraphs.
SLIDE 10
Now lets dive into our demo where we will test this with a real example

We are going to create and publish our first subgraph.

In this case, we are going to create a subgraph that indexes the USDT smart contract on the Sepholia network (Ethereum's testnet).

After that we will use the Subgraph to obtain the last two transfers registered in the blokchain of 10 USDT.

We will do this from the command line and from a Javascript application.

So, lets get to it.
SLIDE EXTRA
Strengths:
Data Accessibility: Makes blockchain data easily accessible and usable for various applications, enhancing business offerings.
Decentralization: Promotes a decentralized approach to data handling, aligning with the ethos of blockchain technology.
Cost-Effective: Reduces the overhead costs associated with traditional data indexing and querying methods.
Real-Time Data: Provides up-to-date information, essential for businesses making data-driven decisions.
Wide Adoption: Already used by many popular dApps in the Ethereum ecosystem, indicating reliability and effectiveness.
Developer Benefits:
Ease of Use: Familiar GraphQL interface for querying blockchain data.
Scalability: Efficiently handles large volumes of data, suitable for high-traffic dApps.
Flexibility: Supports various blockchain networks, not just Ethereum.
Community Support: Strong community and documentation, making integration and troubleshooting easier.